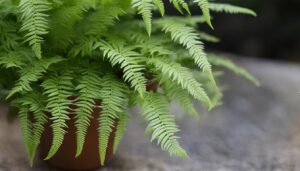
Dieffenbachia Maculata, also known as Dumb Cane, is an easy-to-care-for houseplant that can bring vibrancy to any indoor space. This popular plant can grow between 3 to 5 feet indoors and thrives in bright, indirect light. With the right planting and care, you can enjoy the lush foliage and striking beauty of Dieffenbachia Maculata in your home.
Table of Contents
ToggleKey Takeaways:
- Choose well-drained potting soil with a high peat content for planting Dieffenbachia Maculata.
- Water the plant thoroughly once the top 2 inches of soil have dried out, avoiding overwatering.
- Provide high humidity through misting or using a tray of pebbles filled with water.
- Maintain a temperature of 65 to 75 degrees Fahrenheit for optimal growth.
- Fertilize every four to six weeks with a balanced, diluted fertilizer.
- Propagate Dieffenbachia Maculata through root division, stump cuttings, or cane cuttings.
- Prune to maintain desired height and shape, and repot annually for healthy growth.
Dieffenbachia Maculata can face challenges such as pests, blooming difficulties, and leaf discoloration. However, with proper care, including adjusting watering schedules, providing nutrients, and ensuring adequate light, these issues can be resolved. By following these planting and caring tips, you can enjoy the beauty and low-maintenance nature of Dieffenbachia Maculata in your home.
Dieffenbachia Maculata Varieties: A Splash of Color for Your Home
Dieffenbachia Maculata comes in a variety of stunning colors and patterns, making it a visually appealing addition to any home. These vibrant varieties offer a range of options to suit different preferences and interior styles.
One popular variety is the Dieffenbachia Maculata ‘Tropic Snow,’ which features large, dark green leaves with prominent white spots. Its contrasting colors add a splash of brightness to any space. Another eye-catching option is the Dieffenbachia Maculata ‘Camille,’ known for its yellow and green variegated leaves that create a striking display.
If you prefer a more dramatic look, consider the Dieffenbachia Maculata ‘Rudolph Roehrs.’ This variety showcases deep green leaves with yellow margins and maroon undersides, creating a bold and unique appearance. For those seeking a touch of elegance, the Dieffenbachia Maculata ‘Sterling’ is an excellent choice. Its silver-gray leaves with dark green borders add a touch of sophistication to any room.
| Variety | Leaf Color | Leaf Pattern |
|---|---|---|
| Dieffenbachia Maculata ‘Tropic Snow’ | Dark green with white spots | Contrasting |
| Dieffenbachia Maculata ‘Camille’ | Yellow and green variegated | Distinctive |
| Dieffenbachia Maculata ‘Rudolph Roehrs’ | Deep green with yellow margins and maroon undersides | Dramatic |
| Dieffenbachia Maculata ‘Sterling’ | Silver-gray with dark green borders | Elegant |
These are just a few examples of the wide range of Dieffenbachia Maculata varieties available. Each one offers a unique combination of colors and patterns, allowing you to find the perfect fit for your home. Whether you prefer a bold statement or a subtle touch of beauty, there is a Dieffenbachia Maculata variety to suit your taste.
Adding a Splash of Color to Your Indoor Space
When incorporating Dieffenbachia Maculata into your home, consider the existing color scheme and overall aesthetic. The vibrant foliage of these varieties can serve as a focal point or complement other elements in the room.
For a cohesive look, pair the variegated varieties with furniture or decor pieces that feature similar colors. This will create a harmonious and visually appealing space. If you prefer a more eclectic look, mix and match different Dieffenbachia Maculata varieties to create a vibrant and dynamic display.
Remember to provide the appropriate care for your chosen variety, ensuring it receives the right amount of light, water, and humidity. With proper care, these colorful Dieffenbachia Maculata varieties will thrive, bringing beauty and life to your indoor space.
The Perfect Spot: Light Requirements for Dieffenbachia Maculata
Dieffenbachia Maculata thrives in bright, indirect light, and finding the right spot for it in your home is essential for its healthy growth. This popular indoor plant prefers a well-lit area but should be shielded from direct sunlight, as it can scorch its leaves. Placing your Dieffenbachia near a north or east-facing window is ideal, as it will receive bright, indirect light without being exposed to harsh rays.
If you don’t have a suitable window spot, you can also grow Dieffenbachia under fluorescent lights. Position the lights about 12 to 18 inches above the plant and leave them on for 12 to 16 hours a day. This will provide the necessary light energy for photosynthesis and promote strong, vibrant growth.
In situations where natural light is limited, you can consider using artificial grow lights specifically designed for indoor plants. These lights emit a spectrum of light that mimics natural sunlight and can be adjusted to meet the specific light requirements of your Dieffenbachia Maculata.
Avoiding Plant Stress due to Insufficient Light
Insufficient light can cause your Dieffenbachia Maculata to become leggy with pale, elongated stems and small leaves. The lack of light can also affect the plant’s ability to photosynthesize, leading to weak growth and reduced vigor. To ensure your plant thrives, you can rotate it every few weeks to expose all sides to light evenly. This will prevent the plant from leaning towards the light source and promote balanced growth.
| Light Requirements: | Light Intensity: | Recommended Hours of Light: |
|---|---|---|
| Bright, indirect light | Medium to high | 12 to 16 hours per day |
| Artificial grow lights | Adjustable depending on plant’s needs | 12 to 16 hours per day |
With the right amount of light, your Dieffenbachia Maculata will thrive and display its stunning foliage. Remember to monitor your plant and adjust its light conditions as needed to ensure optimal growth and health.
Potting and Soil: Creating the Right Environment for Dieffenbachia Maculata
Creating a suitable environment for your Dieffenbachia Maculata starts with selecting the right potting soil and ensuring proper indoor care. When choosing potting soil, opt for a well-drained mix with a high peat content. This will provide the necessary moisture retention while allowing excess water to escape, preventing the roots from becoming waterlogged. Additionally, using a pot with drainage holes is essential to avoid water accumulation at the bottom, which can lead to rot.
Dieffenbachia Maculata is a tropical plant that thrives in high humidity. To mimic its natural habitat, you can place a tray of pebbles filled with water beneath the pot. As the water evaporates, it will create a moisture-rich environment around the plant. Alternatively, misting the leaves regularly can also help increase humidity levels.
When it comes to indoor care, it’s important to provide the right amount of light for your Dieffenbachia Maculata. While it prefers bright, indirect light, direct sunlight can scorch its leaves. Placing the plant near a north or east-facing window is ideal. If your space lacks natural light, you can supplement with artificial grow lights to ensure proper growth.
Potting and Soil Care Tips:
- Choose well-drained potting soil with a high peat content.
- Use a pot with drainage holes to prevent water accumulation.
- Place a tray of pebbles filled with water beneath the pot or mist the leaves to increase humidity.
- Position the plant in an area with bright, indirect light, away from direct sunlight.
| Watering Tips | Fertilizing Tips |
|---|---|
| Thoroughly water the plant once the top 2 inches of soil have dried out. | Fertilize every four to six weeks with a balanced, diluted fertilizer. |
| Avoid overwatering to prevent root rot. | Adjust the frequency of fertilizing based on the plant’s growth and the season. |
| Reduce watering frequency during the winter months. | Use a fertilizer specifically formulated for houseplants. |
Remember, Dieffenbachia Maculata is a low-maintenance plant that can thrive indoors with proper care and attention. By providing the right potting soil, humidity, light, and regular watering and fertilization, you can ensure the optimal growth and health of your Dieffenbachia Maculata.
Watering Techniques: Keeping Your Dieffenbachia Maculata Hydrated
Proper watering is crucial for the health of your Dieffenbachia Maculata, and understanding its unique hydration needs is essential. Overwatering can lead to root rot, while underwatering can cause the leaves to wilt and turn yellow. By following a few simple watering techniques, you can ensure that your Dieffenbachia thrives and remains vibrant.
First, it’s important to check the soil moisture before watering your Dieffenbachia. Stick your finger about 2 inches into the soil, and if it feels dry, it’s time to water. Avoid watering on a strict schedule, as the frequency may vary depending on factors such as temperature, humidity, and the size of the pot.
When watering, it’s best to use room temperature water. Pour water into the pot until it begins to drain from the bottom, ensuring that the roots receive adequate hydration. Empty any excess water from the saucer to prevent the plant from sitting in standing water, which can lead to root rot.
To maintain proper hydration levels, misting the leaves or placing the pot on a tray of pebbles filled with water can help increase humidity around the plant. This is especially beneficial during dry winter months or if you live in a low-humidity environment. Regularly monitor the moisture levels of the soil and adjust your watering routine accordingly to avoid over or underwatering.
| Watering Tips: |
|---|
| Check soil moisture before watering |
| Water when the top 2 inches of soil are dry |
| Use room temperature water |
| Avoid overwatering and standing water |
| Mist the leaves or use a tray of water and pebbles to increase humidity |
By following these watering techniques, you can provide your Dieffenbachia Maculata with the right amount of hydration it needs to thrive. Remember to consider environmental factors and adjust your watering routine as necessary. With proper care, your Dieffenbachia will reward you with lush foliage and a vibrant presence in your indoor space.
Humidity Needs: Creating a Moisture-Rich Environment for Dieffenbachia Maculata
Dieffenbachia Maculata thrives in high humidity environments, and ensuring adequate moisture levels is key to its overall well-being. As a tropical plant, it requires a humidity level of at least 50% to maintain healthy growth and prevent issues such as leaf browning or wilting.
One way to increase humidity for your Dieffenbachia Maculata is through regular misting. Fill a spray bottle with filtered water and mist the leaves several times a week. This mimics the natural moisture found in its native rainforest habitat. Another effective method is to place a tray of pebbles filled with water beneath the pot. As the water evaporates, it creates a humid microclimate around the plant.
Creating a Humidity Tray:
- Select a shallow tray or saucer that can fit beneath the pot.
- Add a layer of small pebbles to the tray.
- Pour water into the tray until it reaches just below the surface of the pebbles.
- Place the pot on top of the pebbles, ensuring it is not sitting directly in the water.
Keep an eye on the water level in the tray and refill as needed to maintain moisture. Another option is to use a humidifier in the room where the Dieffenbachia Maculata is located. This can help create a constant and controlled humidity level for the plant.
| Humidity Level | Recommended Actions |
|---|---|
| Below 50% | Mist the leaves regularly and use a humidity tray or humidifier to increase moisture. |
| 50-70% | Monitor the humidity levels and adjust misting or tray watering accordingly. |
| Above 70% | Avoid overwatering and ensure proper ventilation to prevent excessive humidity. |
By providing the right level of humidity, you can create a moisture-rich environment that will promote lush growth and vibrant foliage for your Dieffenbachia Maculata.
Feeding Your Plant: Fertilizing Dieffenbachia Maculata for Optimal Growth
Regularly fertilizing your Dieffenbachia Maculata is essential to provide it with the necessary nutrients for healthy growth. As a tropical plant, Dieffenbachia Maculata has higher nutrient requirements compared to other houseplants. Feeding your plant every four to six weeks during the growing season will help it thrive and maintain vibrant foliage.
When choosing a fertilizer, opt for a balanced, water-soluble formula that is diluted according to the instructions on the packaging. This will ensure that your plant receives a well-rounded mix of essential nutrients. Nitrogen, phosphorus, and potassium are the key nutrients needed for optimal growth. Nitrogen promotes leaf development, phosphorus supports root growth, and potassium aids in overall plant health.
During the fertilization process, it is crucial to water your Dieffenbachia Maculata thoroughly before applying the fertilizer. This will prevent any potential root burn that can occur when applying fertilizer to dry soil. Always follow the recommended dosage and avoid overfertilizing, as this can lead to nutrient build-up and damage the plant. Remember, less is often more when it comes to fertilizing indoor plants.
| Fertilizer Type | Application Frequency |
|---|---|
| Water-soluble balanced fertilizer | Every 4-6 weeks during the growing season |
By consistently fertilizing your Dieffenbachia Maculata and providing it with the proper care, you can enjoy a lush and thriving indoor plant. Be sure to observe your plant’s response to the fertilizer and adjust the feeding schedule or dilution rate if needed. With a balanced nutrient supply, your Dieffenbachia Maculata will flourish and bring beauty to your home.
Propagation Methods: Expanding Your Dieffenbachia Maculata Collection
If you’ve fallen in love with Dieffenbachia Maculata and want to expand your collection, propagation is an exciting and rewarding process to try. With a few simple techniques, you can create new plants from your existing ones and enjoy the beauty of Dieffenbachia in various corners of your home.
- Root Division: This method involves separating the roots of an established Dieffenbachia plant and replanting them individually. Carefully remove the plant from its pot and gently separate the roots into sections, making sure each section has healthy roots and foliage. Plant the divisions in separate pots with well-drained soil and keep them in a warm and humid environment until they establish roots.
- Stump Cuttings: If your Dieffenbachia has become leggy or overgrown, you can rejuvenate it by taking stump cuttings. Use a clean, sharp knife or shears to cut the stem at a desirable height. Remove the lower leaves, leaving a few at the top. Dip the cut end in rooting hormone and plant it in a container filled with moist, well-draining soil. Place the container in a warm location with indirect light and mist the cutting regularly to keep the humidity high. Soon, you’ll see new growth emerging from the stump.
- Cane Cuttings: Dieffenbachia can also be propagated using cane cuttings. Select a healthy, mature cane with several nodes, and use a sharp knife to make a clean cut just below a node. Remove the lower leaves, leaving a few at the top. Dip the cut end in rooting hormone and plant it in a container filled with a well-draining soil mix. Keep the soil consistently moist and place the container in a warm, bright location. Over time, the cutting will develop roots and new leaves.
Table: Propagation Methods for Dieffenbachia Maculata
| Propagation Method | Steps |
|---|---|
| Root Division | 1. Carefully separate roots 2. Plant in separate pots |
| Stump Cuttings | 1. Cut stem at desired height 2. Remove lower leaves 3. Dip in rooting hormone 4. Plant in container |
| Cane Cuttings | 1. Select a healthy cane with nodes 2. Make a clean cut below a node 3. Remove lower leaves 4. Dip in rooting hormone 5. Plant in container |
Propagation allows you to not only expand your Dieffenbachia Maculata collection but also share the beauty of these plants with others. Experiment with different methods and find the one that works best for you. Remember to be patient and provide the right conditions for successful root development. Soon enough, you’ll have a flourishing collection of Dieffenbachia plants, each with their unique character and charm.
Pruning Techniques: Shaping and Maintaining Your Dieffenbachia Maculata
Pruning is necessary to keep your Dieffenbachia Maculata looking neat, balanced, and in the desired shape. Regular pruning helps remove any dead or yellowing leaves, promotes branching, and encourages new growth. Here are some pruning techniques to help you maintain your Dieffenbachia Maculata:
- Remove dead or yellow leaves: Start by inspecting your plant and identifying any dead or yellowing leaves. Use clean pruning shears or scissors to carefully remove these leaves at the base where they meet the stem. This will not only improve the overall appearance of your plant but also prevent any potential diseases from spreading.
- Trim leggy stems: If you notice that your Dieffenbachia Maculata has long, leggy stems with sparse foliage, you can trim them back to encourage branching. Cut the stem just above a leaf node, which is the point where a leaf emerges from the stem. This will stimulate the growth of new shoots and create a bushier appearance.
- Shape your plant: Pruning can also be used to shape your Dieffenbachia Maculata according to your preference. If you want a compact and symmetrical plant, trim the longer stems to match the height of the shorter ones. You can also trim the sides of the plant to maintain a balanced shape.
- Prune for height control: If your Dieffenbachia Maculata is growing taller than desired, you can prune the main stem to control its height. Cut the stem just above a leaf node to encourage new growth from that point. This will help you maintain the desired height and prevent your plant from becoming too leggy.
Pruning Tips:
When pruning your Dieffenbachia Maculata, it is important to follow some key tips to ensure your plant remains healthy:
- Use clean and sharp pruning shears or scissors to avoid causing damage to the plant.
- Disinfect your pruning tools before and after each use to prevent the spread of diseases.
- Prune during the growing season when your plant is actively growing and can recover more quickly.
- Apply a small amount of rubbing alcohol to a clean cloth and gently wipe the blades of your pruning tools to sanitize them.
- Dispose of any pruned leaves or stems properly to prevent pests or diseases from spreading.
By following these pruning techniques and tips, you can ensure that your Dieffenbachia Maculata remains healthy, well-shaped, and vibrant for years to come!
| Pruning Techniques: | Tips: |
|---|---|
| Remove dead or yellow leaves | Use clean pruning shears or scissors |
| Trim leggy stems | Cut above a leaf node to encourage branching |
| Shape your plant | Trim longer stems and maintain balance |
| Prune for height control | Cut above a leaf node to maintain desired height |
Common Issues: Pests, Blooming Challenges, and Troubleshooting Tips
While Dieffenbachia Maculata is generally easy to care for, it can encounter some common issues that require attention and care. One of the most common issues is pests, particularly spider mites. These tiny pests can infest the leaves, causing them to turn yellow and eventually die. To combat spider mites, you can use horticultural oil to suffocate them and increase humidity around the plant. Misting the leaves or placing the pot on a tray of pebbles filled with water can create a more unfavorable environment for these pests.
Another issue that Dieffenbachia Maculata may face is blooming challenges. While this plant can produce unscented white flowers, blooming can be difficult, especially when grown indoors. Factors such as inadequate light, incorrect watering, or lack of nutrients can hinder blooming. To encourage blooming, ensure that your plant is receiving the right amount of bright, indirect light and the appropriate nutrients. Adjusting the watering schedule and providing a balanced, diluted fertilizer can also help stimulate flowering.
Yellowing leaves can be a common cause for concern among Dieffenbachia Maculata owners. In most cases, yellow leaves indicate over or underwatering, lack of nutrients, or inadequate light. To address this issue, it’s important to assess and adjust the watering schedule, making sure not to over or underwater the plant. Providing the proper nutrients through fertilization can also help green up the leaves. Additionally, ensuring that your plant is receiving adequate light, preferably bright, indirect light, can promote healthy leaf growth.
| Common Issues | Causes | Solutions |
|---|---|---|
| Spider Mites | Infestation due to low humidity | Apply horticultural oil, mist leaves, and increase humidity |
| Blooming Challenges | Inadequate light, incorrect watering, lack of nutrients | Ensure bright, indirect light, adjust watering and fertilization schedule |
| Yellow Leaves | Over or underwatering, lack of nutrients, inadequate light | Assess and adjust watering schedule, provide balanced fertilizer, ensure adequate light |
By addressing these common issues promptly and providing the necessary care, you can ensure that your Dieffenbachia Maculata remains healthy and vibrant. With its low-maintenance nature and beautiful foliage, this indoor plant can be a delightful addition to any home.
When to Repot: Ensuring Healthy Growth for Your Dieffenbachia Maculata
Repotting your Dieffenbachia Maculata is essential to provide it with fresh soil and ample space for its roots to grow. As the plant matures, its roots may outgrow the current pot, leading to overcrowding and restricted growth. By repotting, you can ensure that your Dieffenbachia has the optimal environment for healthy development.
So, how do you know when it’s time to repot your Dieffenbachia Maculata? One of the telltale signs is when you notice the roots poking out through the drainage holes at the bottom of the pot. This indicates that the plant has outgrown its current container and needs a larger one. Additionally, if your Dieffenbachia is showing signs of stunted growth, such as yellowing leaves or declining health, it may be a sign that it needs more room to thrive.
When repotting your Dieffenbachia, choose a pot that is one size larger than its current one. This will allow the roots to spread out comfortably and promote healthy growth. Make sure the new pot has drainage holes to prevent waterlogging, as sitting in overly wet soil can lead to root rot. Fill the new pot with a well-draining potting mix, such as one that contains peat moss or perlite, to provide the right balance of moisture and aeration for the plant.
| Steps for Repotting Dieffenbachia Maculata: |
|---|
| 1. Gently remove the plant from its current pot, taking care not to damage the roots. |
| 2. Inspect the roots, trimming any that are damaged or diseased. |
| 3. Place a layer of fresh potting mix at the bottom of the new pot. |
| 4. Position the Dieffenbachia in the center of the new pot and fill in the remaining space with potting mix, ensuring that the plant is at the same depth as before. |
| 5. Gently press down the soil to secure the plant in place. |
| 6. Water the plant thoroughly, allowing any excess water to drain away. |
| 7. Place the repotted Dieffenbachia in a suitable location with appropriate lighting and humidity. |
By following these repotting guidelines, you can ensure that your Dieffenbachia Maculata continues to thrive and display its vibrant foliage. Remember, repotting is not only about providing a new home for your plant but also an opportunity to rejuvenate its growth and maintain its overall health.
Conclusion
Dieffenbachia Maculata is a beautiful and low-maintenance houseplant that can thrive indoors with proper care, making it a perfect choice for any plant lover. This popular indoor plant, also known as Dumb Cane, adds a touch of elegance and vibrancy to any home or office space.
To ensure the healthy growth of your Dieffenbachia Maculata, it is important to provide it with the right environment. Place it in a location where it can receive bright, indirect light, as direct sunlight can scorch its leaves. The temperature should be maintained between 65 to 75 degrees Fahrenheit to keep it comfortable.
When it comes to watering, it’s best to let the top 2 inches of soil dry out before giving it a thorough watering. Be cautious not to overwater, as this can lead to root rot. High humidity is preferred by Dieffenbachia, and you can increase it by misting the leaves or placing the pot on a tray of pebbles filled with water.
Regular fertilizing every four to six weeks with a balanced, diluted fertilizer will help promote optimal growth. Pruning may be necessary to maintain the desired height and shape of your Dieffenbachia Maculata. And don’t forget to repot your plant annually to encourage healthy growth.
While caring for your Dieffenbachia Maculata, be mindful of common issues such as pests, blooming challenges, and leaf discoloration. Treat any pests promptly with horticultural oil, and provide the necessary humidity and nutrients to encourage blooming and maintain healthy foliage. Adjusting watering schedules and providing adequate light will help resolve any issues with leaf discoloration.
By following these care tips, you can enjoy the beauty of Dieffenbachia Maculata in your home or office for years to come. This low-maintenance plant will reward you with lush, green foliage and a touch of nature’s beauty indoors.
FAQ
How tall does Dieffenbachia Maculata grow indoors?
Dieffenbachia Maculata can grow between 3 to 5 feet indoors.
What kind of lighting does Dieffenbachia Maculata need?
Dieffenbachia Maculata thrives in bright, indirect light.
What type of soil should I use when planting Dieffenbachia?
Use well-drained potting soil with a high peat content for planting Dieffenbachia.
How often should I water Dieffenbachia Maculata?
Water the plant thoroughly once the top 2 inches of soil have dried out, but be careful not to overwater and cause root rot.
How can I increase humidity for Dieffenbachia Maculata?
Misting the leaves or placing the pot on a tray of pebbles filled with water can help increase humidity for Dieffenbachia Maculata.
How often should I fertilize Dieffenbachia Maculata?
Fertilize the plant every four to six weeks with a balanced, diluted fertilizer.
How can I propagate Dieffenbachia Maculata?
Dieffenbachia can be propagated through root division, stump cuttings, or cane cuttings.
Do Dieffenbachia Maculata plants bloom?
Dieffenbachia Maculata may produce unscented white flowers, but blooming can be challenging, especially indoors.
Why are my Dieffenbachia Maculata leaves turning yellow?
Leaves turning yellow can indicate over or underwatering, lack of nutrients, or inadequate light. Adjusting the watering schedule, providing proper nutrients, and ensuring the appropriate amount of light can help resolve these issues.
How often should I repot Dieffenbachia Maculata?
Dieffenbachia Maculata plants should be repotted annually to ensure healthy growth.